HOW TO MAKE YOUR OWN WREATH BASE

The more I play around with DIY projects, the more I realise how little we actually need to buy. There are so many things on our doorsteps to use and whip into something without spending any money, without a trip to the shops and just using garden trimmings.
Here in Switzerland we’re surrounded by vineyards; I know so many people who have a few vineyards in their own gardens that finding a few spare branches to make this wreath was easy. If you live somewhere where vine aren’t readily available, you can use the same technique with loads of other materials too such as rattan, wicker, straw or any other flexible branches.
Here’s what you’ll need to make your own wreath base using grapevines:
Grapevines (green or dried will work)
Gardening sheers or scissors

Step 1: Cut off the leaves from your vines and give them a general clean.

The vines should be long enough to wrap into a 25cm diameter circle.

Step 2: Take your first vine and twist into a circle, approximately 25cm in diameter.

Step 3: Begin wrapping the vines around the circle. You can cut off any bits sticking out.

Step 4: Ensure as you wrap the vines you’re twisting them around each other to tighten the hold.

Step 5: Use your hands to work the wreath into more of a circle shape if it looks slightly distorted.
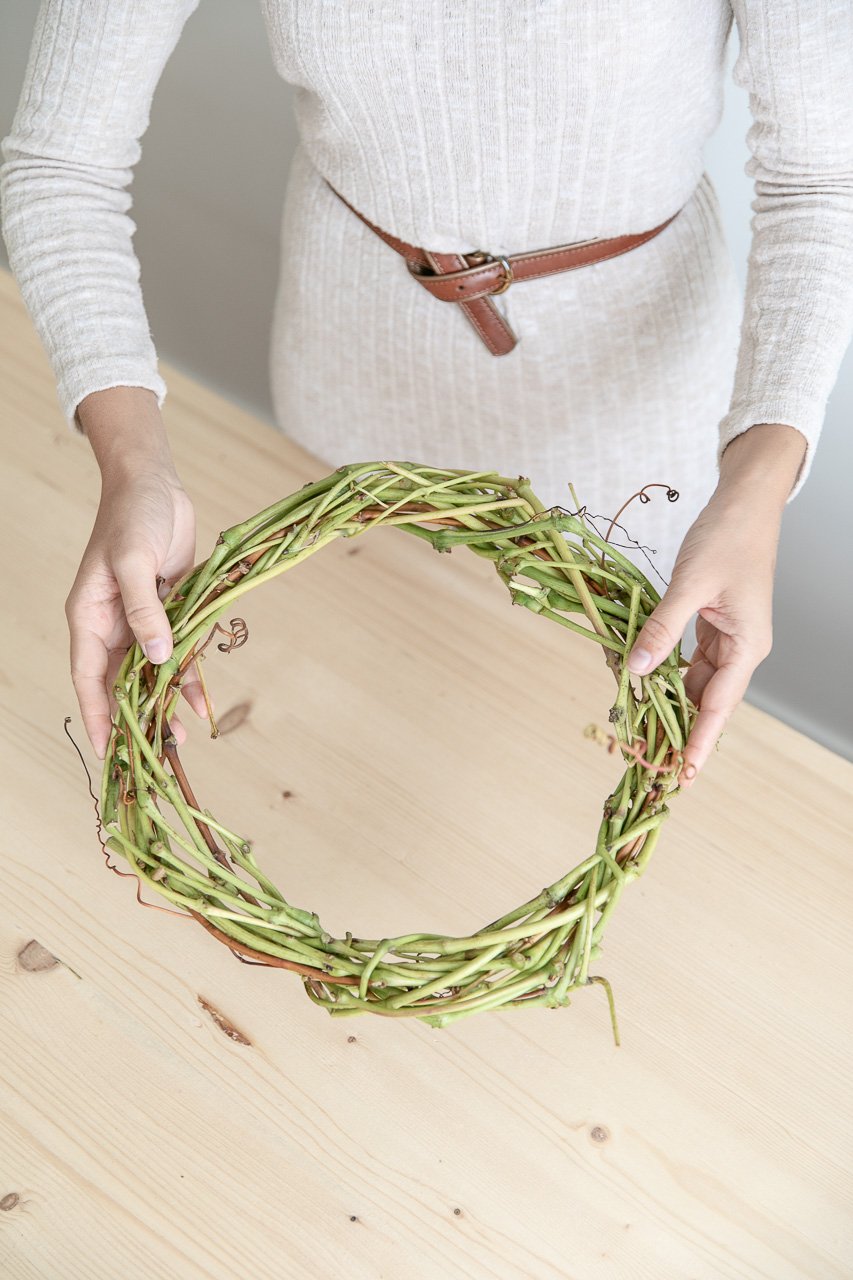
Step 6: Finish off with the finer vines and wrap them all the way around.

Stop when your wreath is approximately 8cm wide all the way around.

Leave your wreath in a warm and dry place to completely dry out before using it.
Tips, tricks and thoughts:
Soaking your vines in warm water can make them more flexible, especially if you’re using dried vines.
Add more vines than you think you’ll need as the wreath will shrink slightly as it dries.
Intertwine the vines as tightly as possible to create a strong base for your wreath.
Whether you have a garden or not, we’ve all got access to someone’s garden who needs a bit of a hand pruning. Pop in and give someone a hand with their garden and I have no doubt you’ll find a few branches you can take home and put to good use!
This was so much easier than I expected and such a great use of something that would normally just be put in the compost.
Thanks for stopping by for a read and happy DIYing! xS